How to Use Weather API in Android Studio
Don't let bad weather catch you off guard. Learn how to integrate the Weather API in Android Studio and get accurate forecasts right at your fingertips.
Updated March 5, 2024.
If you're building an Android app that requires real-time weather data, you need to use a Weather API in Android Studio. This API provides the data you need for current and forecasted weather conditions. Below, we'll show you how to use Weather API in Android Studio. You'll learn how to select a suitable API and set up a project, as well as how to fetch weather data and output it.
Getting an API Key From Tomorrow.io
Before you can start fetching weather data, you'll need an API key from Tomorrow.io. This unique key is your authentication token, letting you access their weather data resources. So, take the following steps to get your API Key:
- Visit the sign-up page: Head to the Tomorrow.io sign-up page to create your free account.
- Register an account: After filling out the forms with your personal information, you'll have a free developer account.
- Find your API Key: You can find your API Key in the API Management Section of the website, as below:
Android Studio Project Setup
Begin by downloading Android Studio from the official website. Ensure you select the correct platform for your system. Given the size of Android Studio, the installation could take up to an hour.
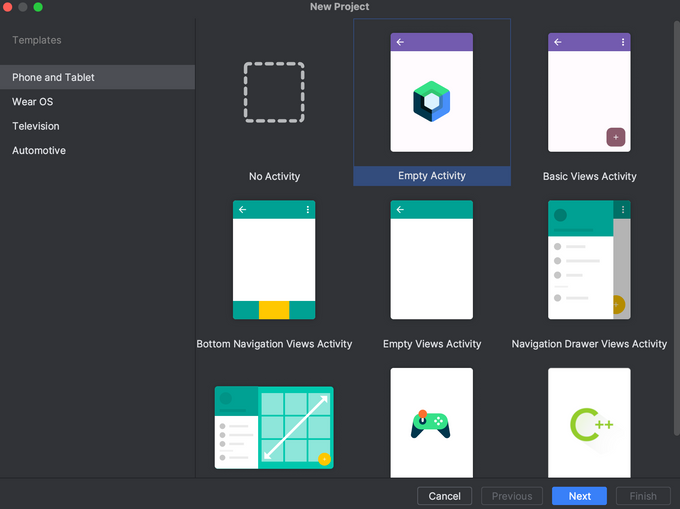
After installation, launch Android Studio, initiate a new project, and select the "Empty Activity" template.
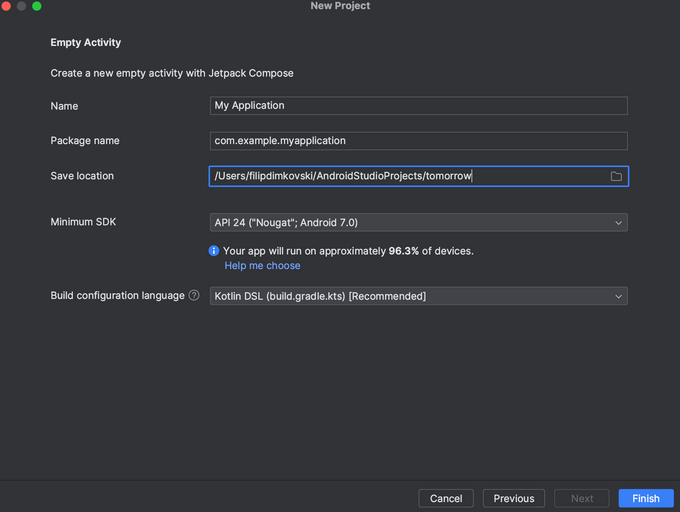
Then, name your Android Studio Weather App and choose the project location, as well as the minimum SDK (Software Development Kit):
You should add the following line of code inside the "dependencies" section of the `build.gradle.kts` file to use the okhttp3 library. This library is used for sending and receiving HTTP-based network requests.
implementation("com.squareup.okhttp3:okhttp:4.12.0")
Then, open the `AndroidManifest.xml` file and add the following permission just above the <application> tag:
<uses-permission android:name="android.permission.INTERNET" />
How to Run the Android Studio Weather App
Once you finish the prerequisites, open the weather forecast API in the Tomorrow.io documentation and choose Kotlin. The following code below is a modified version of the code snippet, which you should paste into the `MainActivity.kt` file:
package com.example.tomorrow

// Import all necessary libraries
import android.os.Bundle
import androidx.activity.ComponentActivity
import androidx.activity.compose.setContent
import androidx.compose.foundation.layout.fillMaxSize
import androidx.compose.material3.MaterialTheme
import androidx.compose.material3.Surface
import androidx.compose.material3.Text
import androidx.compose.runtime.*
import androidx.compose.ui.Modifier
import okhttp3.OkHttpClient
import okhttp3.Request
import kotlinx.coroutines.*
import java.io.IOException

// Main activity class
class MainActivity : ComponentActivity() {
    override fun onCreate(savedInstanceState: Bundle?) {
        super.onCreate(savedInstanceState)
        // Sets the UI content for activity, defining the app's layout
        setContent {
            WeatherApp() // Calls the main WeatherApp composable function to build the UI
        }
    }
}

// A composable function to display the weather data
@Composable
fun WeatherApp() {
    var weatherData by remember { mutableStateOf("Loading...") }

    // LaunchedEffect to fetch weather data
    LaunchedEffect(Unit) {
        weatherData = fetchWeatherData() // Fetch weather data asynchronously
    }

    // UI layout, displaying the weather data or loading message
    Surface(color = MaterialTheme.colorScheme.background) {
        Text(text = weatherData, modifier = Modifier.fillMaxSize())
    }
}

// Suspend function to fetch weather data from the API asynchronously
suspend fun fetchWeatherData(): String = withContext(Dispatchers.IO) { // Perform network operation on IO dispatcher
    val client = OkHttpClient()

    // Build the request with the API URL, HTTP method, and headers
    val request = Request.Builder()
        .url("https://api.tomorrow.io/v4/weather/realtime?location=LOCATION&apikey=YOUR_API_KEY")
        .get()
        .addHeader("accept", "application/json")
        .build()

    // Try to execute the request and handle the response or errors
    try {
        // Execute the request
        val response = client.newCall(request).execute()
        if (response.isSuccessful) { // Return the response body as a string if successful
            response.body?.string() ?: "Error: Empty response"
        } else {
            "Error: ${response.message}" // Return an error message if response is unsuccessful
        }
    } catch (e: IOException) {
        "Error: ${e.message}"// Catch and return any IO exceptions that occur
    }
}
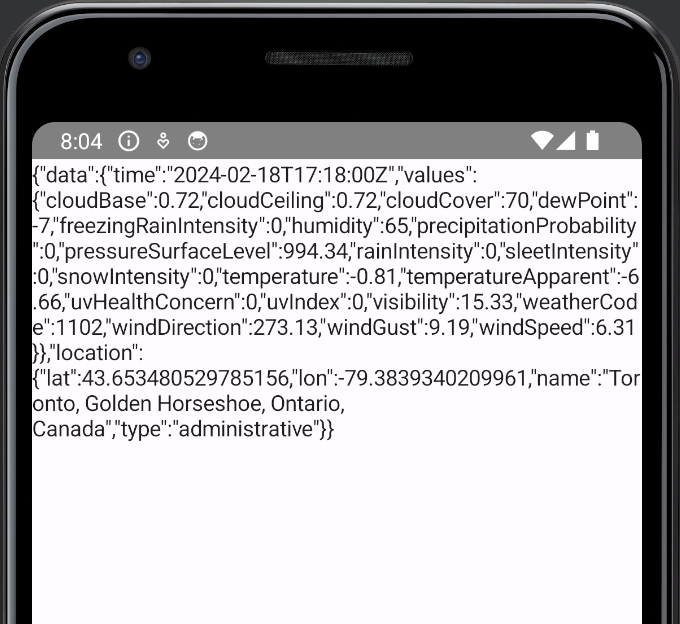
Once you've activated the emulator, press the "Run" button in the top-right corner and wait for the app to run. You should then see the output in the emulator.
Just remember to replace the `YOUR_API_KEY` placeholder with the API key in your account and the `LOCATION` with the place you'd want to fetch real-time weather in.
Analyzing the Output
Let's take a quick look at the output:
{
  "data": {
    "time": "2024-02-18T18:44:00Z",
    "values": {
      "cloudBase": 0.86,
      "cloudCeiling": 0.86,
      "cloudCover": 73,
      "dewPoint": -6.63,
      "freezingRainIntensity": 0,
      "humidity": 59,
      "precipitationProbability": 0,
      "pressureSurfaceLevel": 993.54,
      "rainIntensity": 0,
      "sleetIntensity": 0,
      "snowIntensity": 0,
      "temperature": -0.88,
      "temperatureApparent": -7.91,
      "uvHealthConcern": 0,
      "uvIndex": 0,
      "visibility": 15.33,
      "weatherCode": 1102,
      "windDirection": 241.19,
      "windGust": 14.13,
      "windSpeed": 9.13
    }
  },
  "location": {
    "lat": 43.653480529785156,
    "lon": -79.3839340209961,
    "name": "Toronto, Golden Horseshoe, Ontario, Canada",
    "type": "administrative"
  }
}
Here's how the output should look like in your emulator:
Pushing the Limits of Weather APIs
The integration covered here scratches the surface of what’s possible with weather APIs in Android Studio. Consider leveraging more advanced API features like historical data, severe weather alerts, and granular forecasts. Explore incorporating additional API sources to enrich insights, such as combining weather and traffic data for route planning.
Use Android Studio’s tools to visualize complex API responses through charts, graphs, and maps. The knowledge gained here provides a foundation to build more ambitious integrations with real-time weather data and other real-time data APIs. You can create intelligent weather apps with some creativity by utilizing the full capabilities of these APIs through Android Studio.


